Felixstowe Area “N” Gauge Group
DECEMBER 2021 NEWSLETTER

NEWS FROM MEMBERS by Trevor
2022 Events
We have been discussing what events we think we are able to run for 2022.
We will be holding our normal Open Days in March & October and we have booked the same weekends as this year.
Saturday 26th March 2022 and Saturday 29th October 2022. As normal Kevin Hart will take the lead on organising these.
As you all know we were not able to hold our summer exhibition in either 2020 or 2021. You will also be aware that we were having to move from our previous venue at the Methodist Church. There is still some uncertainty about suitable venues / financial viability and whether we have sufficient manpower within the group to successfully run a show on the scale of previous ones. We have therefore decided that instead we will hold another event at the Welcome Hall. This will be a public event and is likely to be similar to an Open Day but might be slightly different. Our normal exhibition weekend date would clash with the celebrations for the Queens platinum anniversary. Therefore, we have pushed it back a week and the Welcome Hall is booked for Saturday 11th June 2022. I will take the lead on organising this event.
FITTING OUT THE DEPOT by Chris
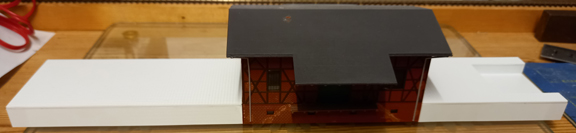
Progress continues on the era 1 German exhibition layout I’m working on, and areas where buildings will be placed are now getting their railway feeder lines laid.
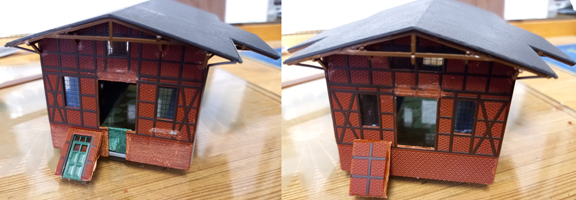
I have bought a second-hand plastic depot building by Faller, it’s missing a few parts and has some bad glue marks, but I can fix all of this.
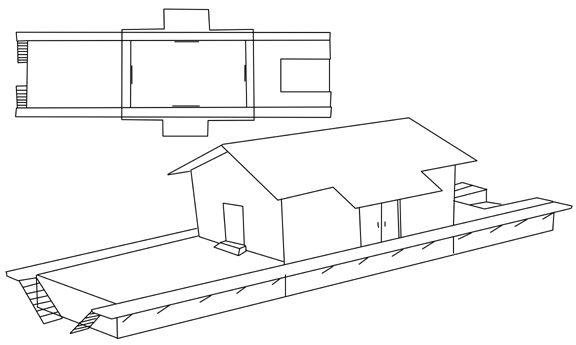
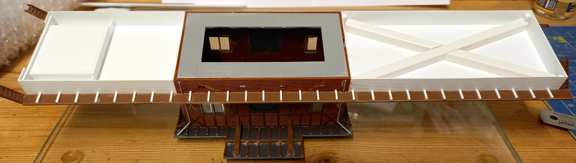
My plan is to extend the loading area on either side to 300mm, so I can have about 4 to 5 wagons on each side being loaded or unloaded.
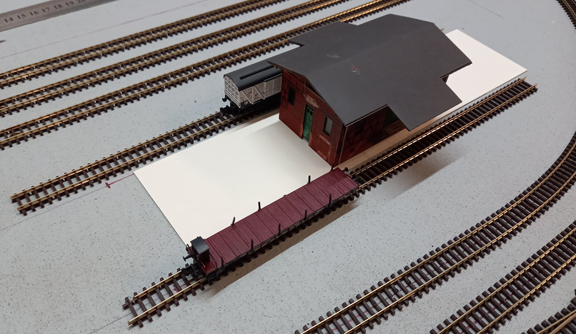
So, the first step is to place down the building and work out the spacing needed between the two lines. This I did with the building and a cardboard cut-out in place of the extended platforms, to check the clearances with some wide and long wagons.
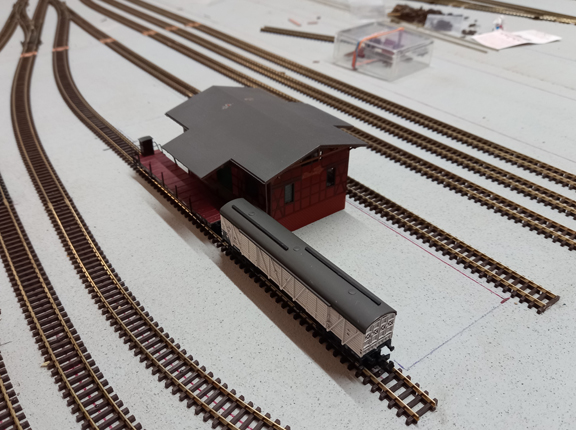
After I was happy with the clearance on each side I mark the board and laid the lines, giving the beginnings of the Depot area.
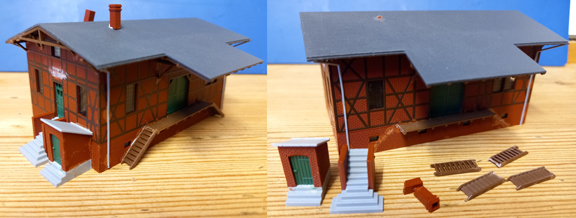
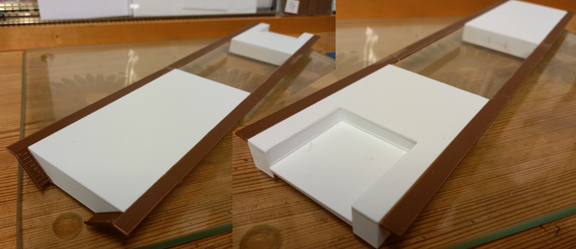
Now the creation of the new Depot building begins, starting by cutting off all the unwanted parts from the current structure. Most parts I plan to reuse on and around the depot.
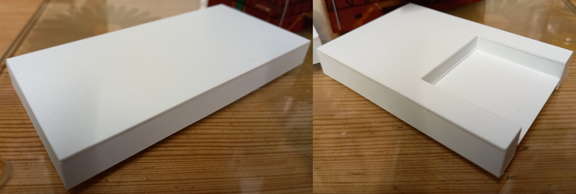
Next on to the making of the two platforms, for these I used plasticard; 1.6mm square tiles for the tops and fine ribbed planking for the sides. After some fettling of the building to square it up I place the three parts together to check the look.
Now the edge decks, these are the wooden planking that the wagons roll along side. Germany often had these as they could be easily adjusted if abnormal width wagons needed to be loaded.
I also reuse the stairs here at one end, later I add the other rest of the steps to the other end as well.
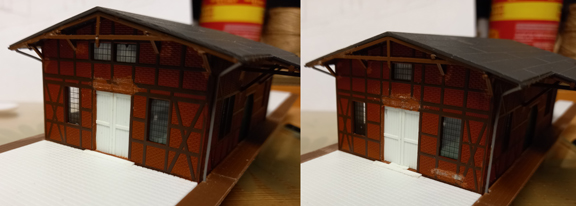
The building is not quite how I need it to be, as now I’m adding extended platforms, I need double doors on either side too. It has a single door one end, but this is not enough. So out comes the scalpel and metal ruler and after some careful cutting I have two new portals and using more planked plasticard I have two sets of double doors that are similar to the front and back doors.
Lastly some final touches: I add the decking supports, 29 tiny fiddly pieces on each side, but they make it look so much better. Then I went over the original building with a fine shape scribing tool, to mark in the lost bricks and planks from the bad glue marks, and I make deeper roof panel marks.
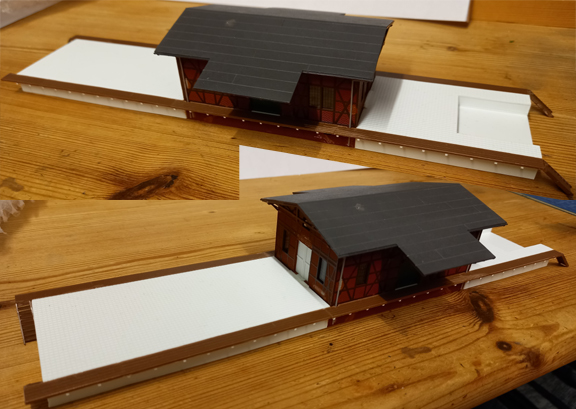
The main part of the build is now finished - well, to the point before I paint it, however that’s a whole other task. Once done I will weather it and add crates, barrels, sacks and staff. So, I plan to have a part 2 for this in the future.
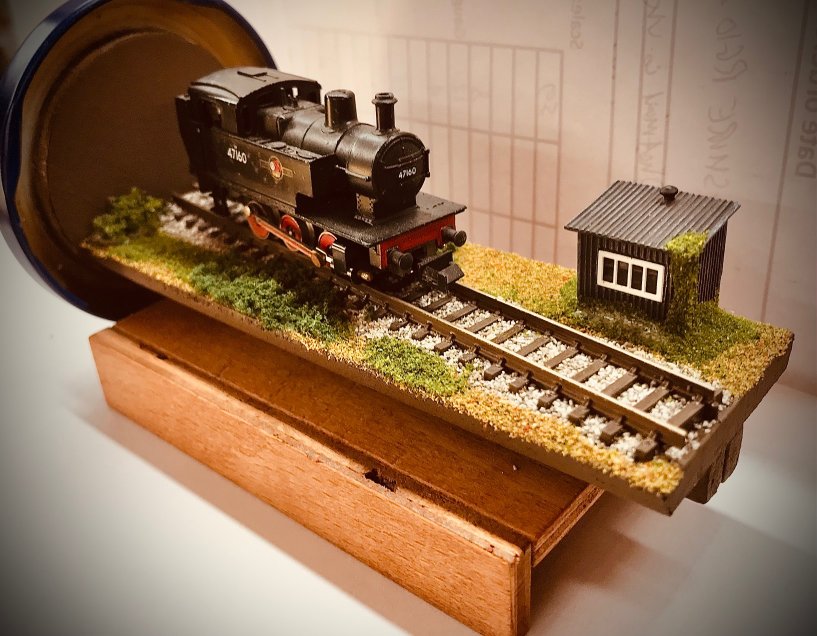
LAYOUT IN A JAR by Chris
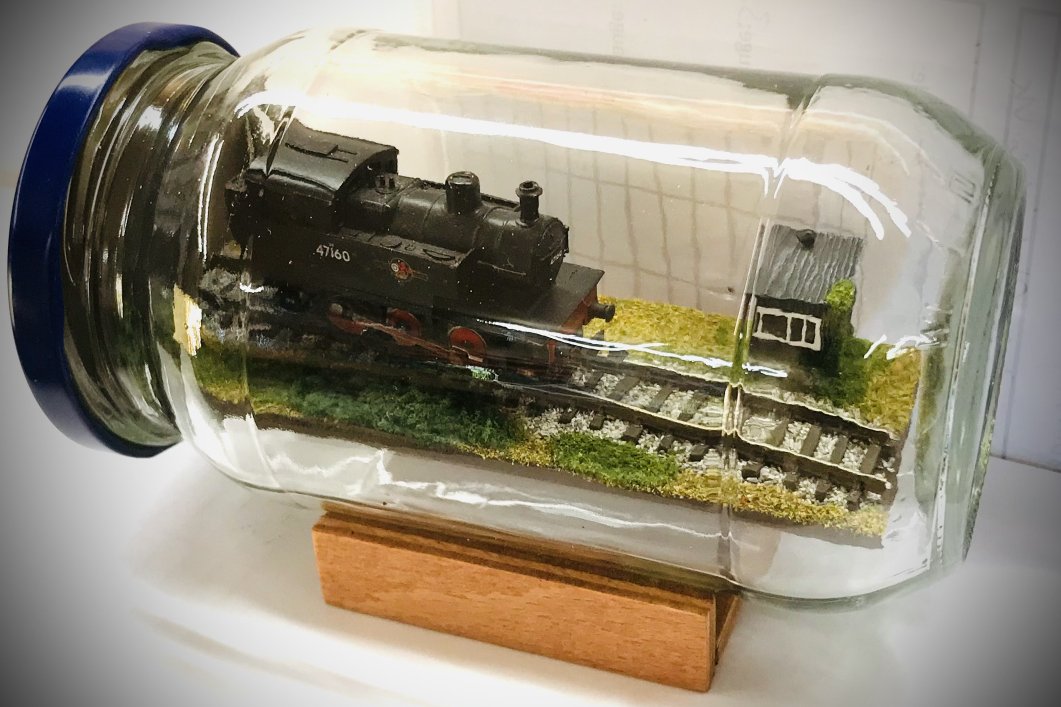
Having seen an article in Model Rail magazine recently about the railway equivalent of a ship in a bottle, but using a jam jar, I thought I'd make one myself. After all, we often need a touch of whimsy after a long day at work!
I selected a suitable jar from my collection (don't ask - one of those items that I tend to hang on to...), I cut a circle of 5mm ply to fit through the jar opening, this was then glued to the jar lid & once the 5mm ply 'baseboard' had been cut, that was glued to it with a strengthening strip underneath it.
The rest was fairly straight forward, you all know how it goes - paint the board brown, stick the track on, spray with weathering paint, ballast it & then add the shed & all the green bits.
In the "bits that don't go anymore" box, I found the Minitrix dock tank loco to complete the scene.
The finished item is very hard to photograph in the jar, although you can see it fine in real life. So that's why I've furnished Mike with photos of the board in & out of the jar.
It was a fun little project to do, took barely any time and creates conversation and interest among any non-railway people that see it.
It was also a good excuse to play with small pieces of ply and PVA glue, something that will keep me occupied for hours!!
MEMBER'S NEW TOYS (1)
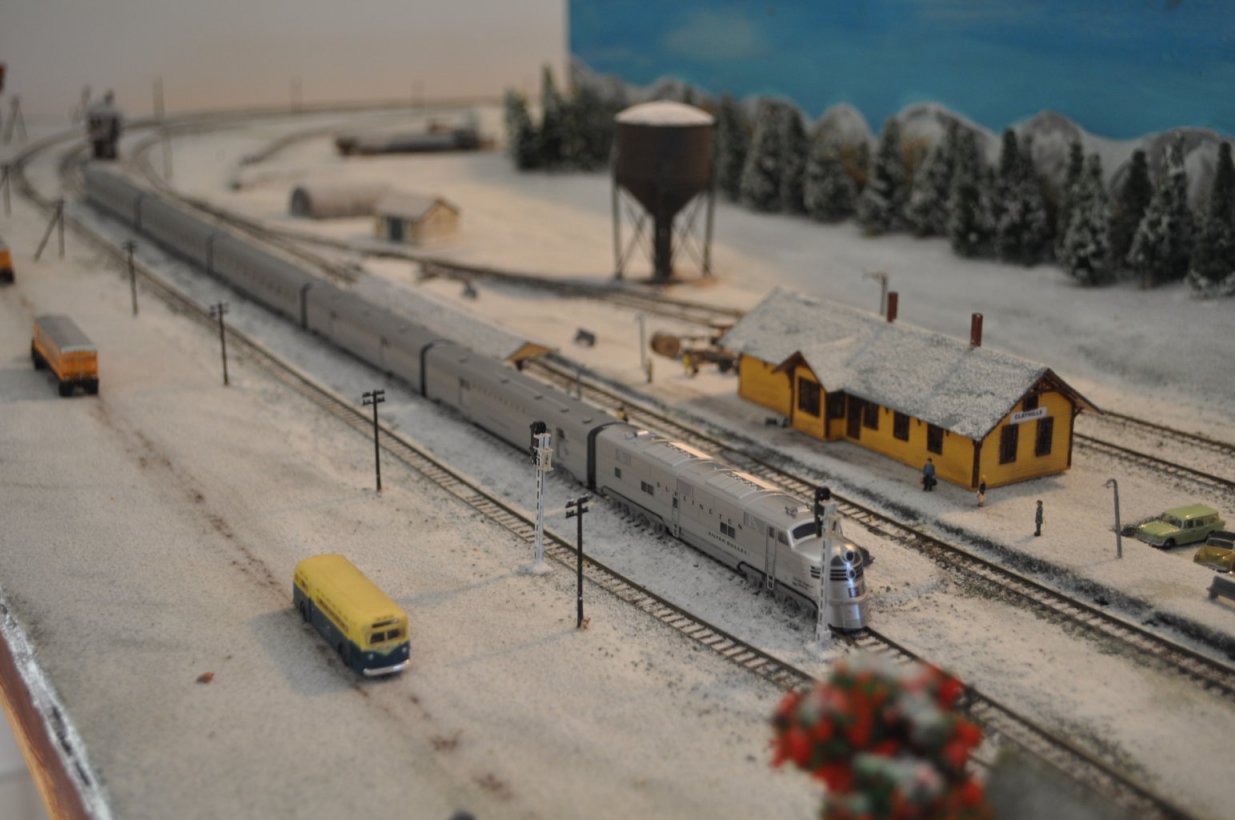
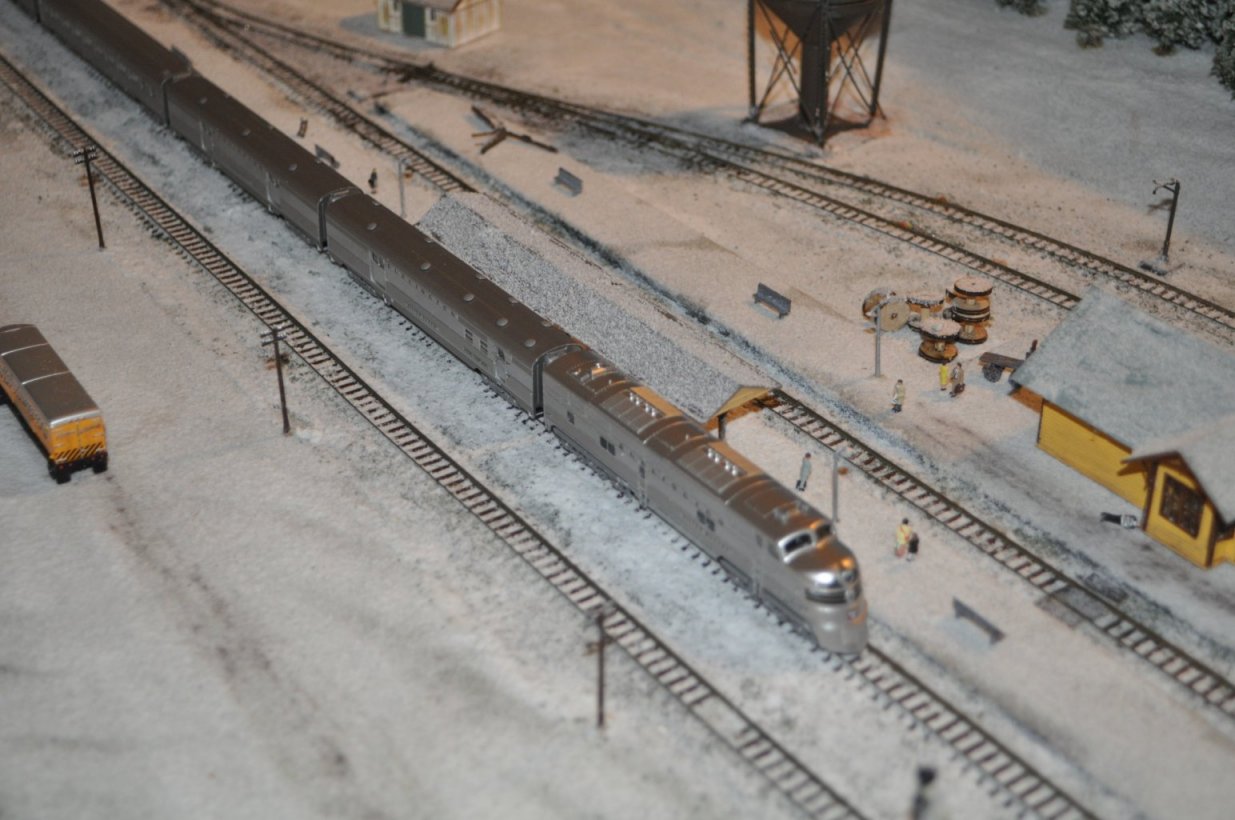
As you all know I rarely buy new stock but was led astray by the review from last December in the N Gauge Journal, of the Burlington Zephyr. I ordered a set from Orwell Models which arrived just in tie for our open day. Brett gave me a very good discount and the loco plus five coaches cost me Ł185. Expensive you might think, until the price is compared to Farish and Dapol. If one looks at the website of a well-known, large retailer the price of a "second hand" Blue Pullman is Ł298 and another "preowned" loco., two coaches and DVT is Ł212.
Add to this the excellent performance and finish of Kato and there's no doubt that I have a very good buy. I've not had such a brilliant performer. It starts and stops so smoothly in DC and runs extremely well, like a dream. I would certainly recommend it to anyone with a taste for American.
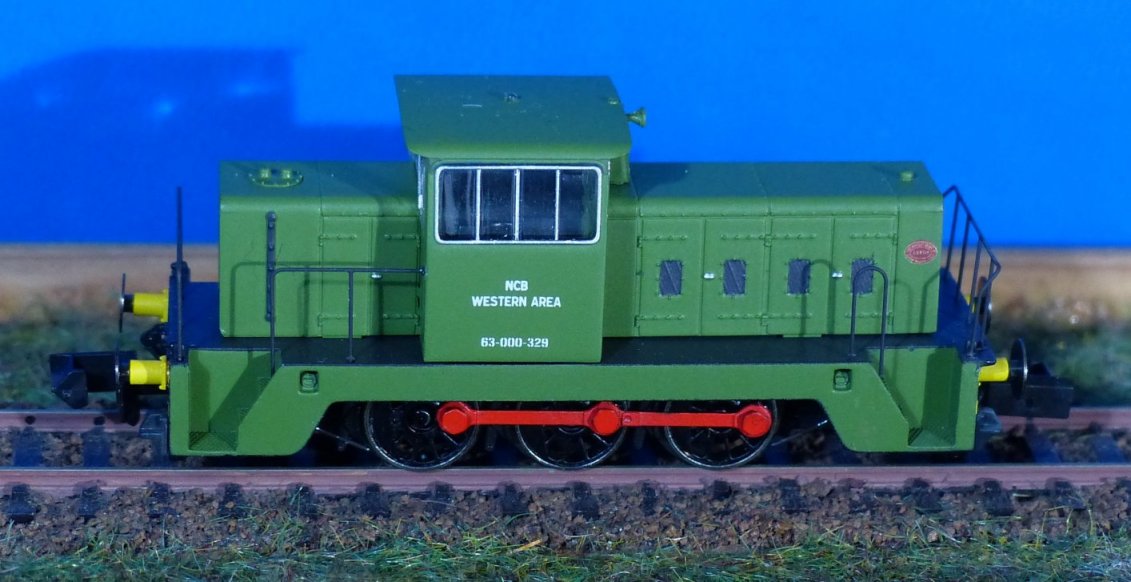
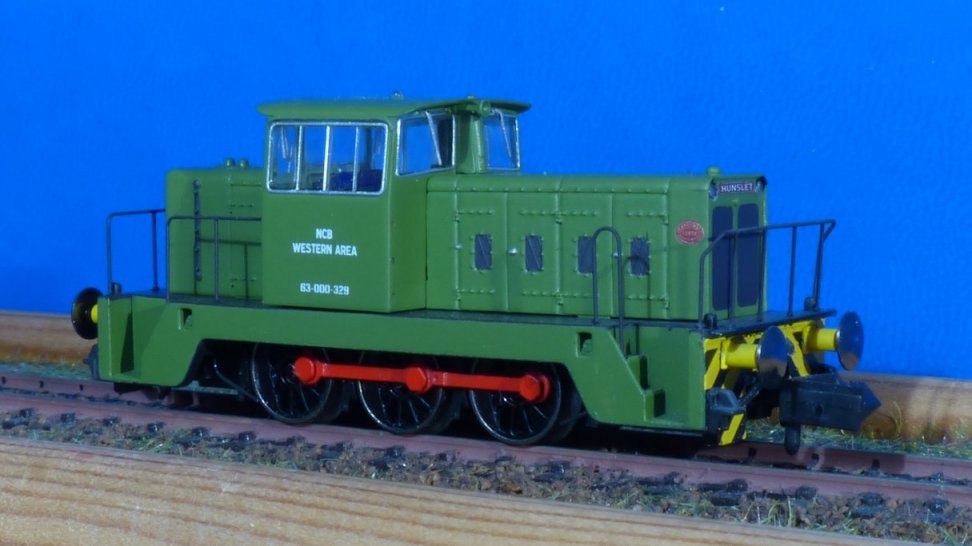
MEMBER'S NEW TOYS (2)
I’m sure, like me, a number of you have been patiently waiting for the N Gauge Society Hunslett shunter(s) to arrive. A couple of weeks a go a letter dropped through the letterbox requesting final payment. After online payment it was only another 2-3 days before one arrived. I have ordered a couple of versions, one in NCB green and a second undecorated one and so far I have received the NCB model.
First impressions are very good. The livery is very neatly applied with details picked nicely. The cab windows are particularly good. Handrails are fine wire parts. Normal rapido couplings are fitted in NEM sockets at both ends so can be swapped. A blanking plate with detailing parts is also supplied if you require it. My model has the flashing amber roof lamp. This is very small / neat and achieved by the use of a light pipe to couple the roof outlet to the LED. A pair of directional headlights are fitted at each end.>
The model can be run with either dc or dcc. I’ve tested it in both modes.
First on dc straight out of the box the loco is impressively smooth. As it has a dcc chip fitted you need about 4v before the chip powers up and anything happens. The headlights and flashing beacon come just before the loco starts to move. The loco is very low geared and top speeds looks to be around a scale 20-25mph. I ran the loco for about 30mins at different speeds and directions without any problems. My only observation is that the headlights are a bit too bright.
In dcc mode you have control over the direction lights and the beacon. In addition to the normal off / on controls you can also dim the headlights, which gives a much better look. The speed control is even better in dcc mode and possible to have the loco barely creeping along. By default, there is a degree on inertia for both acceleration and deceleration, but can be disabled via a shunt function. There is another interesting motor function designed to help with remote uncoupling. A single button press enables the loco to shuffle back and forward automatically.
Overall, I’m very impressed with the model and lives up to the aims the society had in commissioning it.
MEMBER'S NEW TOYS (3)
We have all seen how the availability of new locos and stock has been less lately, so when the opportunity to increase the loco stud by three, I didn't hesitate.
Browsing the Ely model shop, Phil the proprietor, told me that although continuing to stock N gauge items, he was no longer going to stock locos any more.
In with a class 66 and a Southern railway loco, were these - a 4MT tank and two Jintys, one with early and one with late crest.
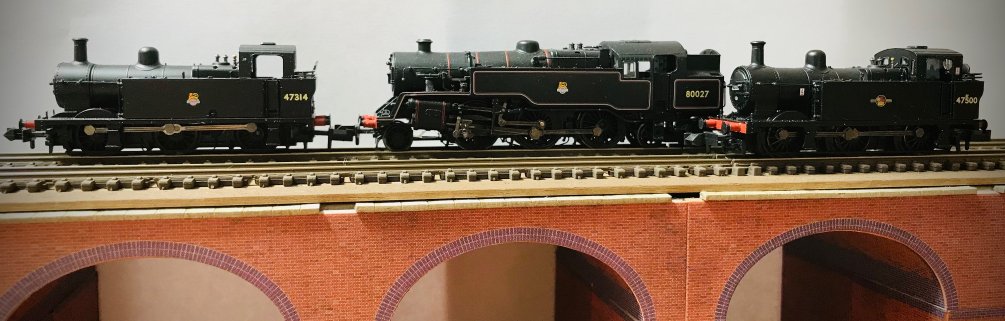
Being a M&GN Railway die hard, the 4MT was of interest to me as occasionally one would stray onto that system, but the Jintys, to my knowledge, never did.
However, recently Eileen and I had walked some of the old railway trails in the Peak District and she had commented that how lovely it would be to have a layout set in this area. Well, with that in mind, the Jintys were then fair game, having been used on the Midland system in that area - hence all three locos came home with me after Phil had offered me a very fair price.
So, here's the plug for Phil (I have no connection etc, just a happy customer etc), Ely models is in the Ely cycle store, he stocks a good range of N gauge as well as general scenic materials. All the Woodlands Scenic range are stocked on a huge stand & paints are available from many different manufacturers as well as glues, weathering powders etc. As well as this, he stocks tons of Airfix and other make model planes, ships, road vehicles. He also does modelling tools and loads of useful bits.
Ely's not a million miles from Felixstowe, a nice day out, lovely town and very busy market on Thursdays.
Just a quick note on the three-loco photo - yes, the viaduct is still not completed, but hope to push on with that over the Christmas period.
MEMBER'S NEW TOYS (4)
I have finally found a reasonably price diesel passenger car which I have been wanting for some time….
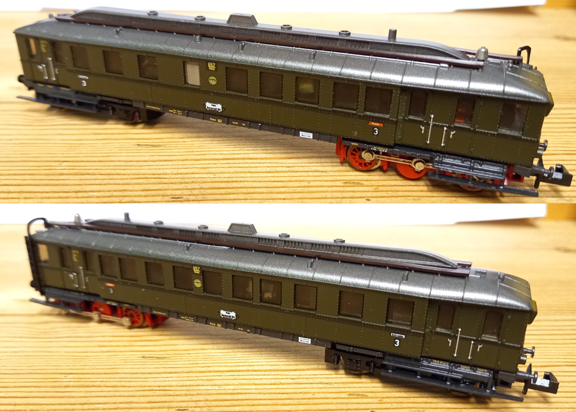
A German era 2, DRG VT858 Triebwagen.