Felixstowe Area “N” Gauge Group
OCTOBER 2020 NEWSLETTER
MEMBER’S ROUNDUP
Trevor - Member’s Open Day Cancelled
As you know we had hoped to be able to hold a members only event instead of our public open day. The recent tightening of the ‘Rule of 6’ has taken away exemptions that would have allowed us to run the event under controlled conditions.
Therefore, we have had to cancel the event. Thanks go to Kevin who had done the planning and those who had been working on layouts to show on the day.
Hopefully we will be back running events sometime next year.
MEMBER’S LAYOUTS by John
John has been trying, without much success, to send me photos of his home layout. Here are a couple of pics that he did manage to get to me, hopefully we’ll see more in due course!
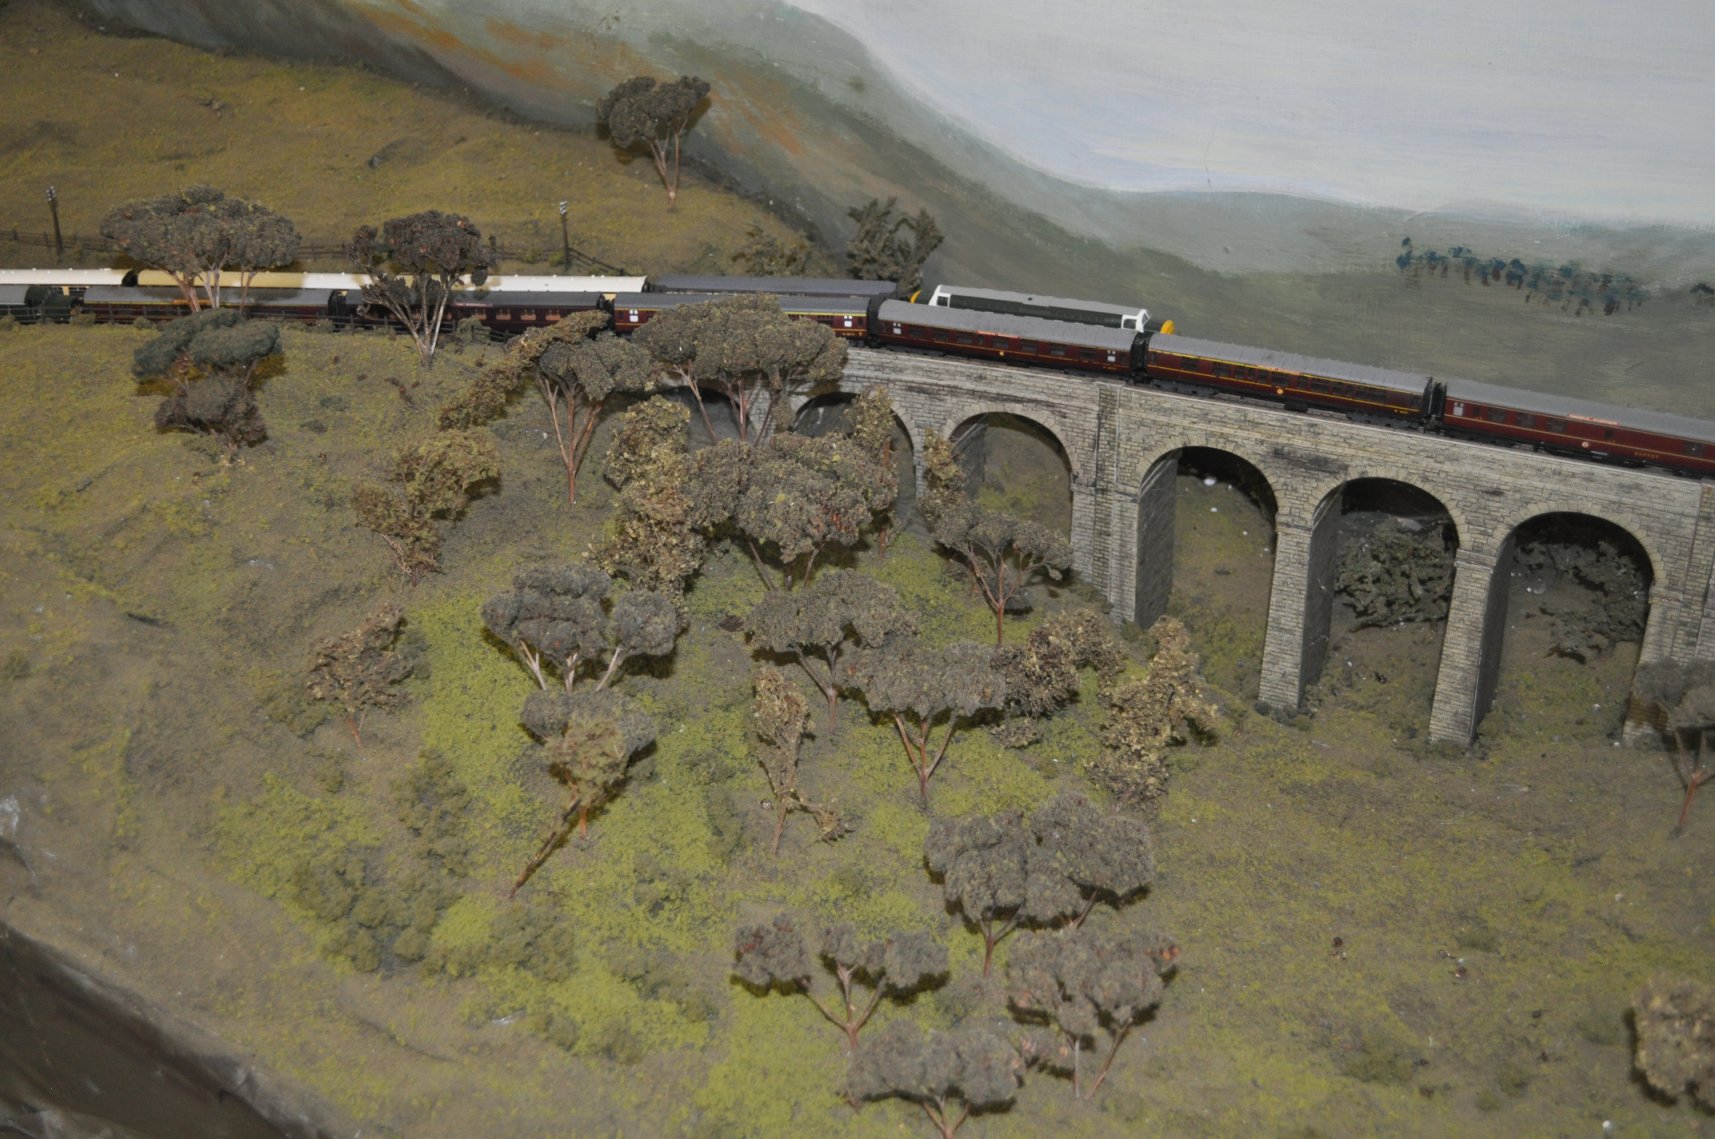
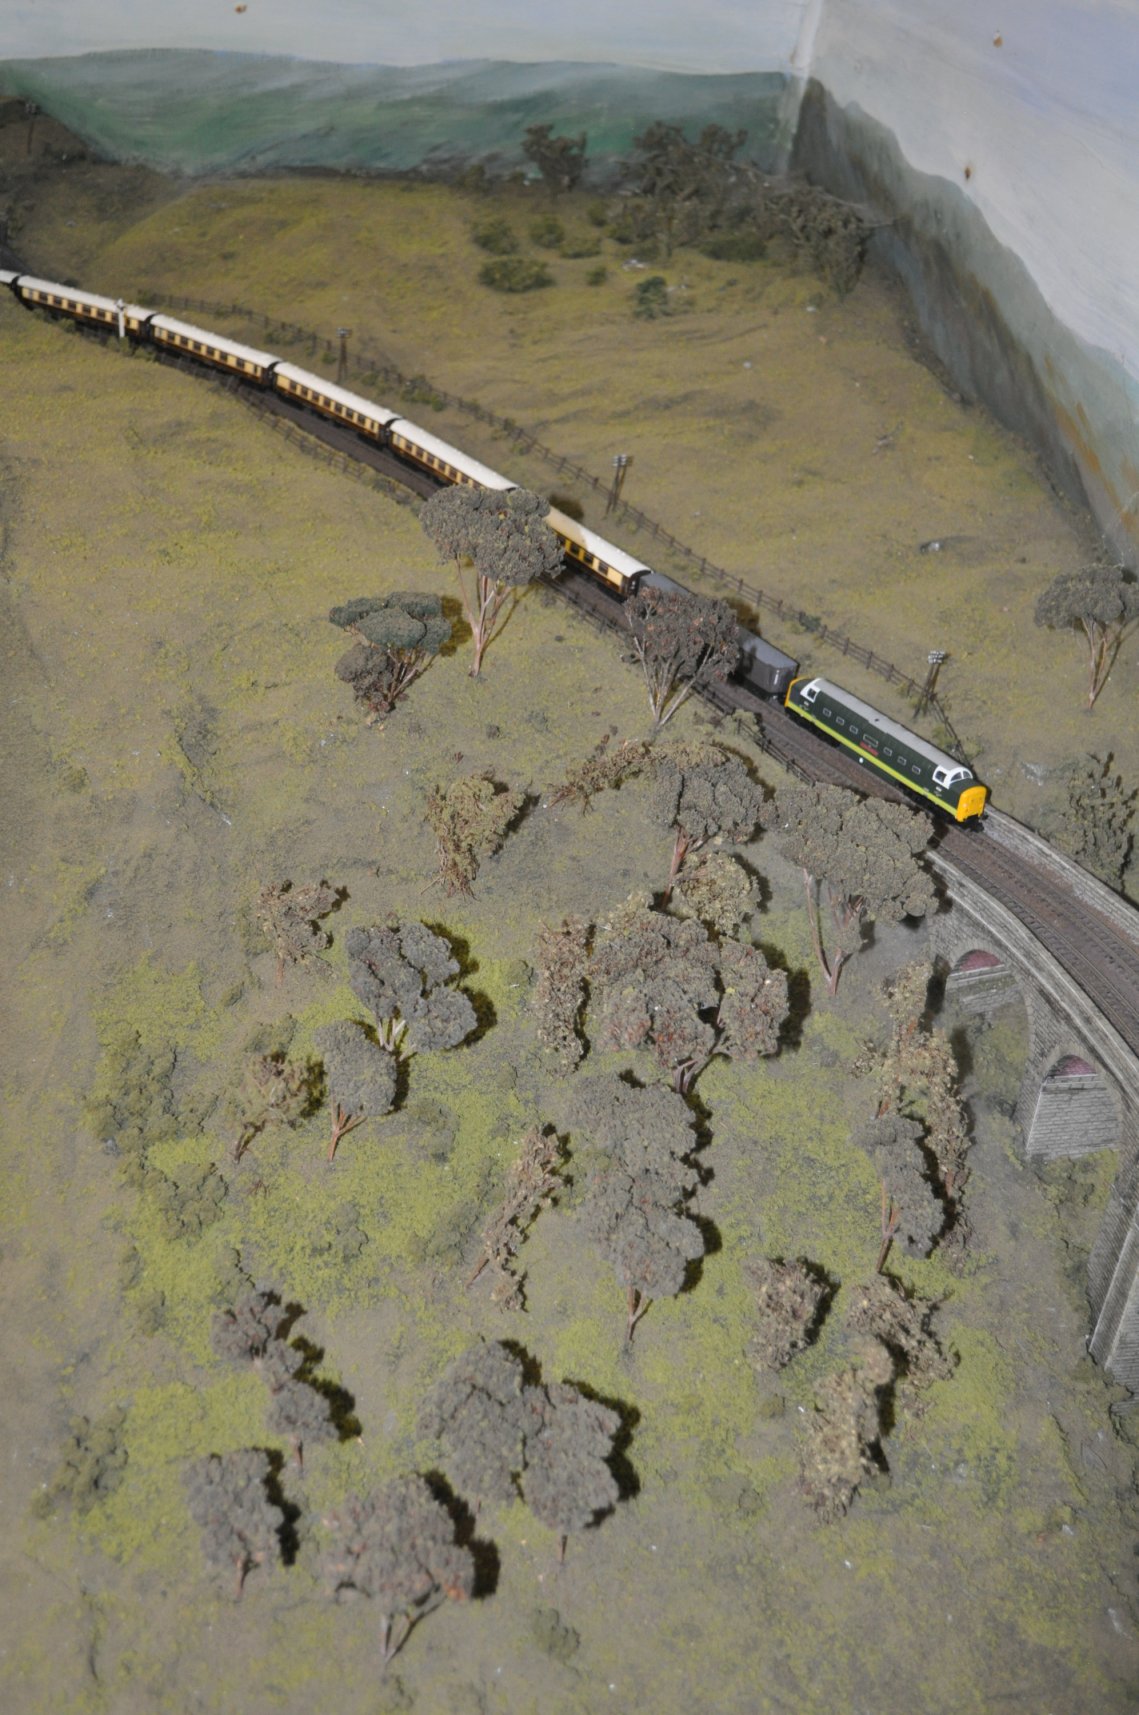
HOME LAYOUT VISIT by Trevor
A number of you will know Graham, who is a member of the ‘n’ gauge section of IRMA. Graham has been a modeller for many years. Initially UK Southern Region, but about 20 years ago Graham switched to modelling American railroads. Graham was the main driving force behind the IRMA group building Clintons Bend from its initial two scenic board setup to the current seven scenic board size. Graham models the mid-west 1940’s – 60’s period and has an extensive selection of rolling stock that has been seen on Clintons Bend over a number of years.
Over the period Graham has also been developing a layout in his garage at home. I recently visited Graham for my first look at the layout named ‘Five Mile Creek’.
The layout is an end to end style forming a U shape along the two longer sides and across one end. At each end of the layout Graham has built multi road return loops that act as fiddle yards.
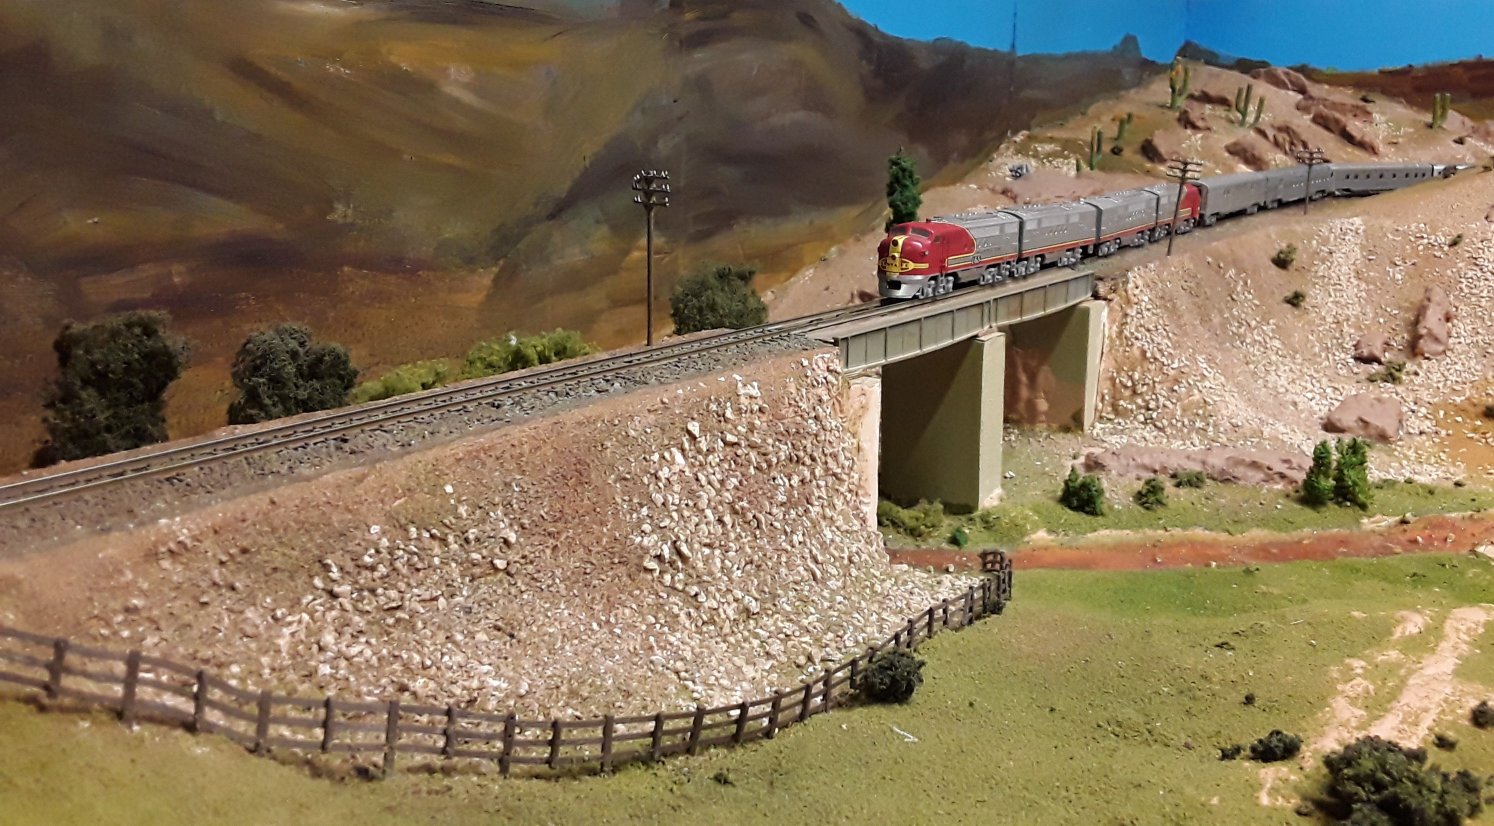
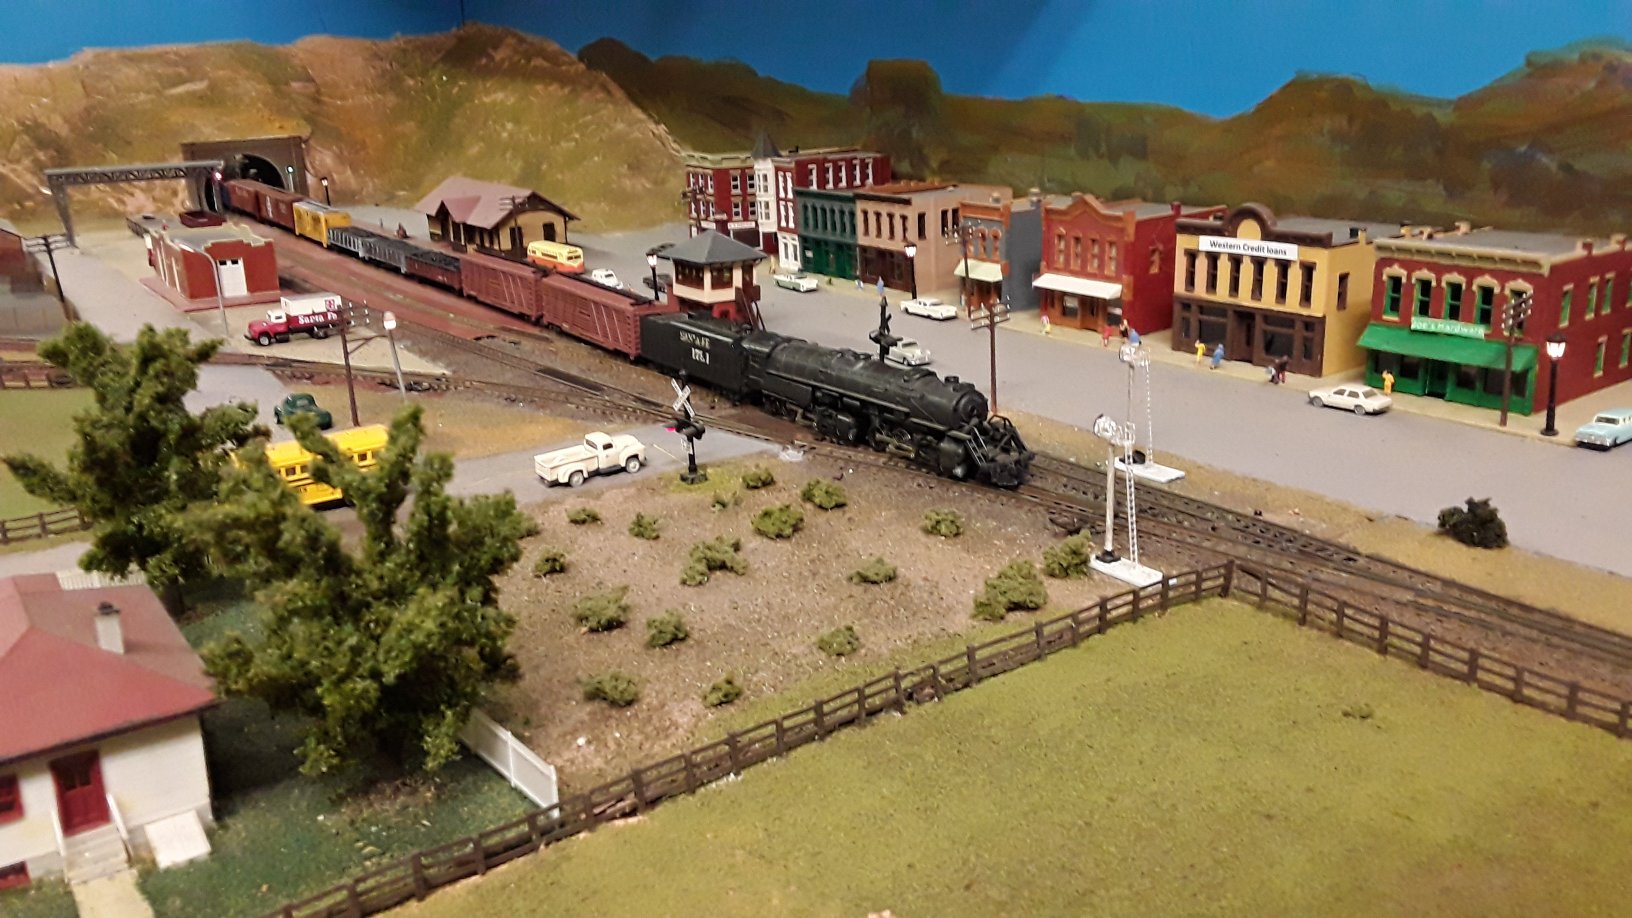
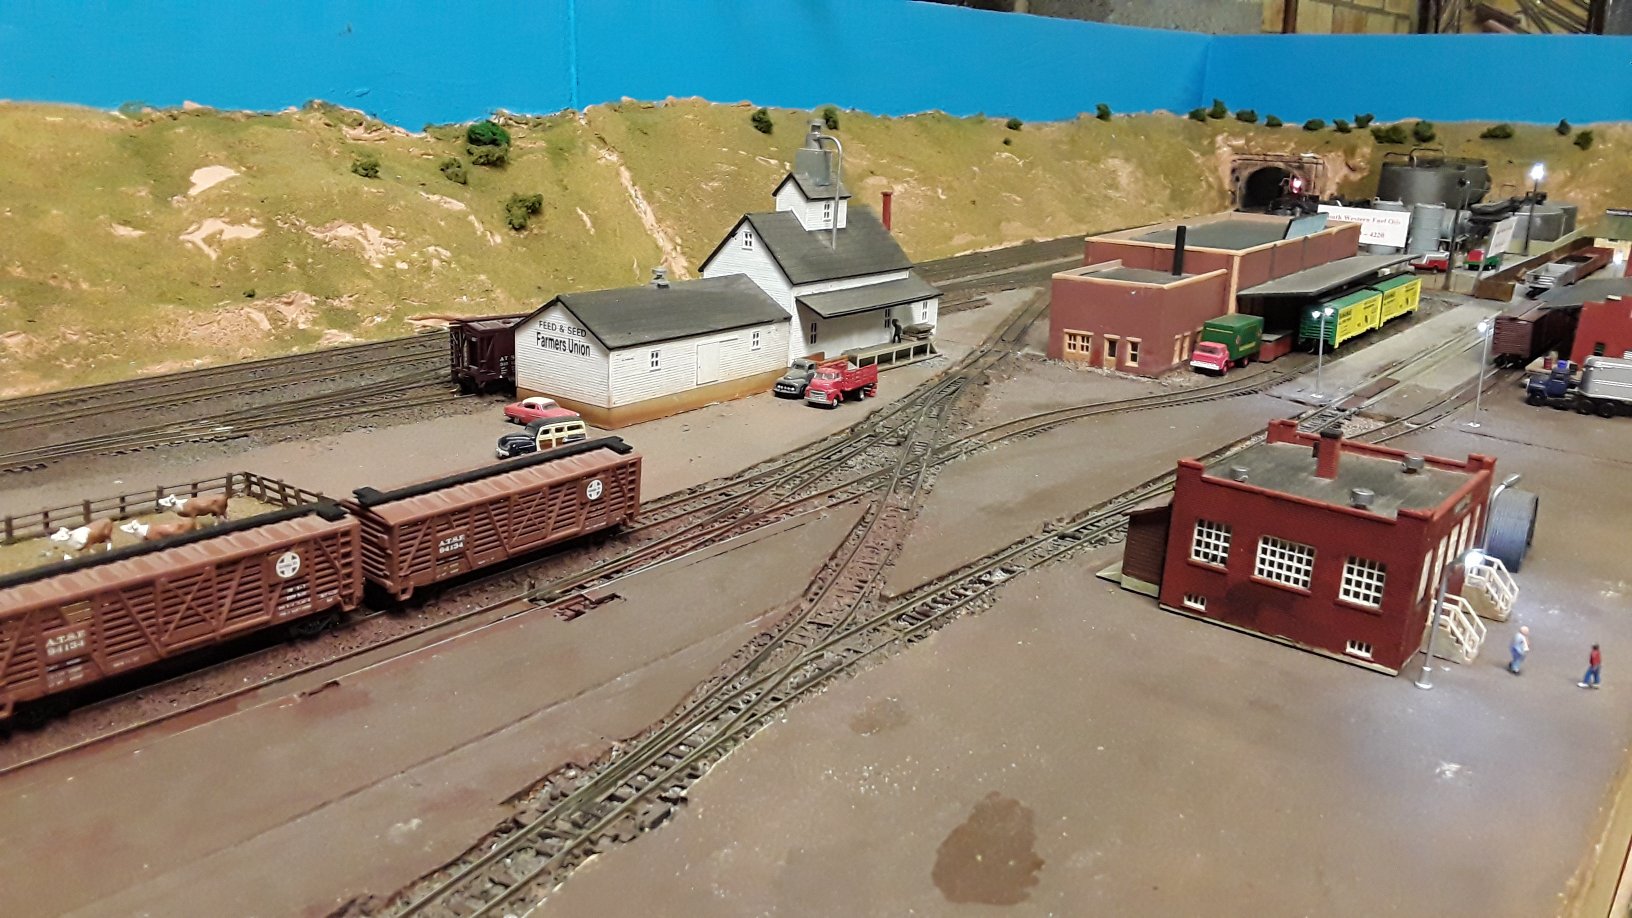
Leaving the fiddle yard trains enter the small town of Five Mile Creek where there is a passenger station with passing loop and some local freight sidings. Around this Graham has modelled a ‘Wild West’ street with a selection of typical buildings. The track then reduces to a single line where it passes through an arid area with the line crossing bridges over dry river beds, rocky outcrops and passing some impressive Cacti.
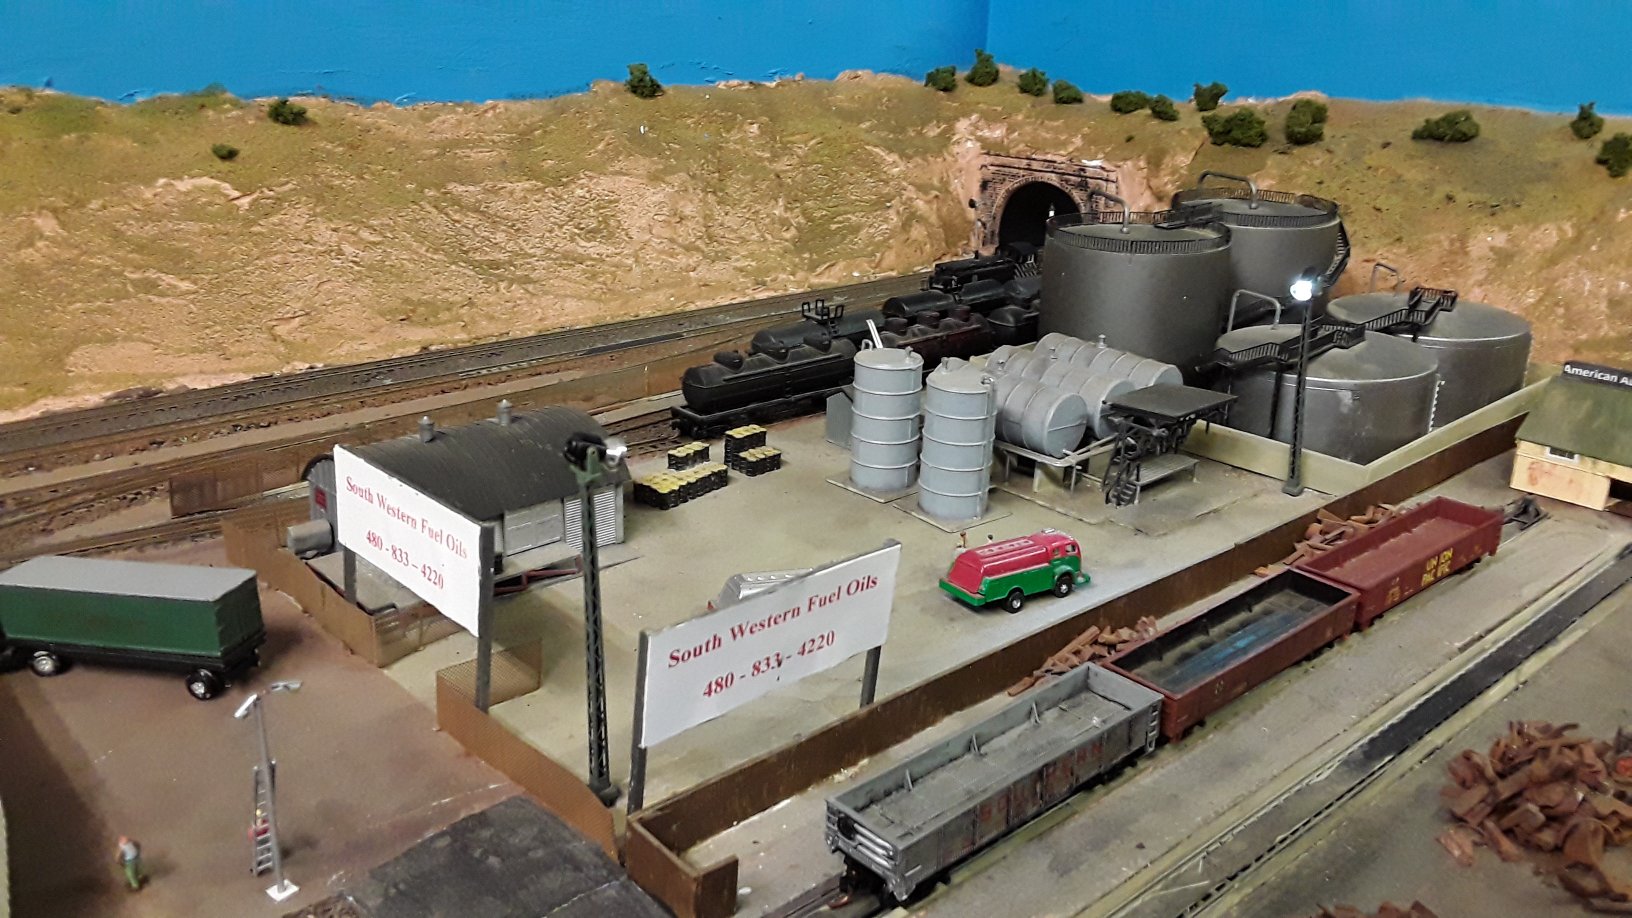
The scenic modelling in the section is particularly good and the fact that the baseboards are higher than typical exhibition level, means the operating point sets your eyeline at track level making the view very striking. This section forms a loop around the garage end and then comes to a larger freight facility with cattle pens, oil depot and general goods. There are passing loops and the area has considerable scope for shunting activities. The track then enters the second fiddle yard.>BR>
It is essentially one man operation with the operator sitting in the middle of the layout which wraps around you. However, it is wired such that sections can be separately controlled with multiple control panels for the fiddle yards, town and freight yards. Points are all electrically switched from the panels. The layout has working light signals and a number of working lights in yards / buildings.
A DOUBLE LAYOUT by Chris
With my father’s previous layout no more, due to it not being practical, we quickly set about designing a new one, as what is the point in having a train collection if you don’t have a layout to run them on?
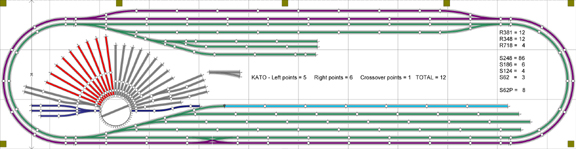
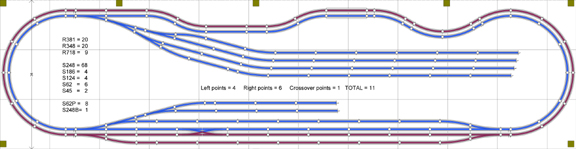
So. after many discussions and draft ideas it came down to a layout being 11’7” x 3’ (353cm x 91.4cm), but we had two designs that would fit perfectly, so the idea formed to have a double deck layout mounting the upper layout 15” (38cm) above the lower layout. We were able to reuse all the kato unitrack from his previous layout and only had to buy a few more points.
The upper layout will be a German style layout, with a long station for ICE and TEE trains with a large storage yard and possibly a large turntable complex.
The lower layout will be a Swiss style layout with an equally long station and yards lines for long Swiss freights and a terminus for local trains and a lot of rolling scenery.
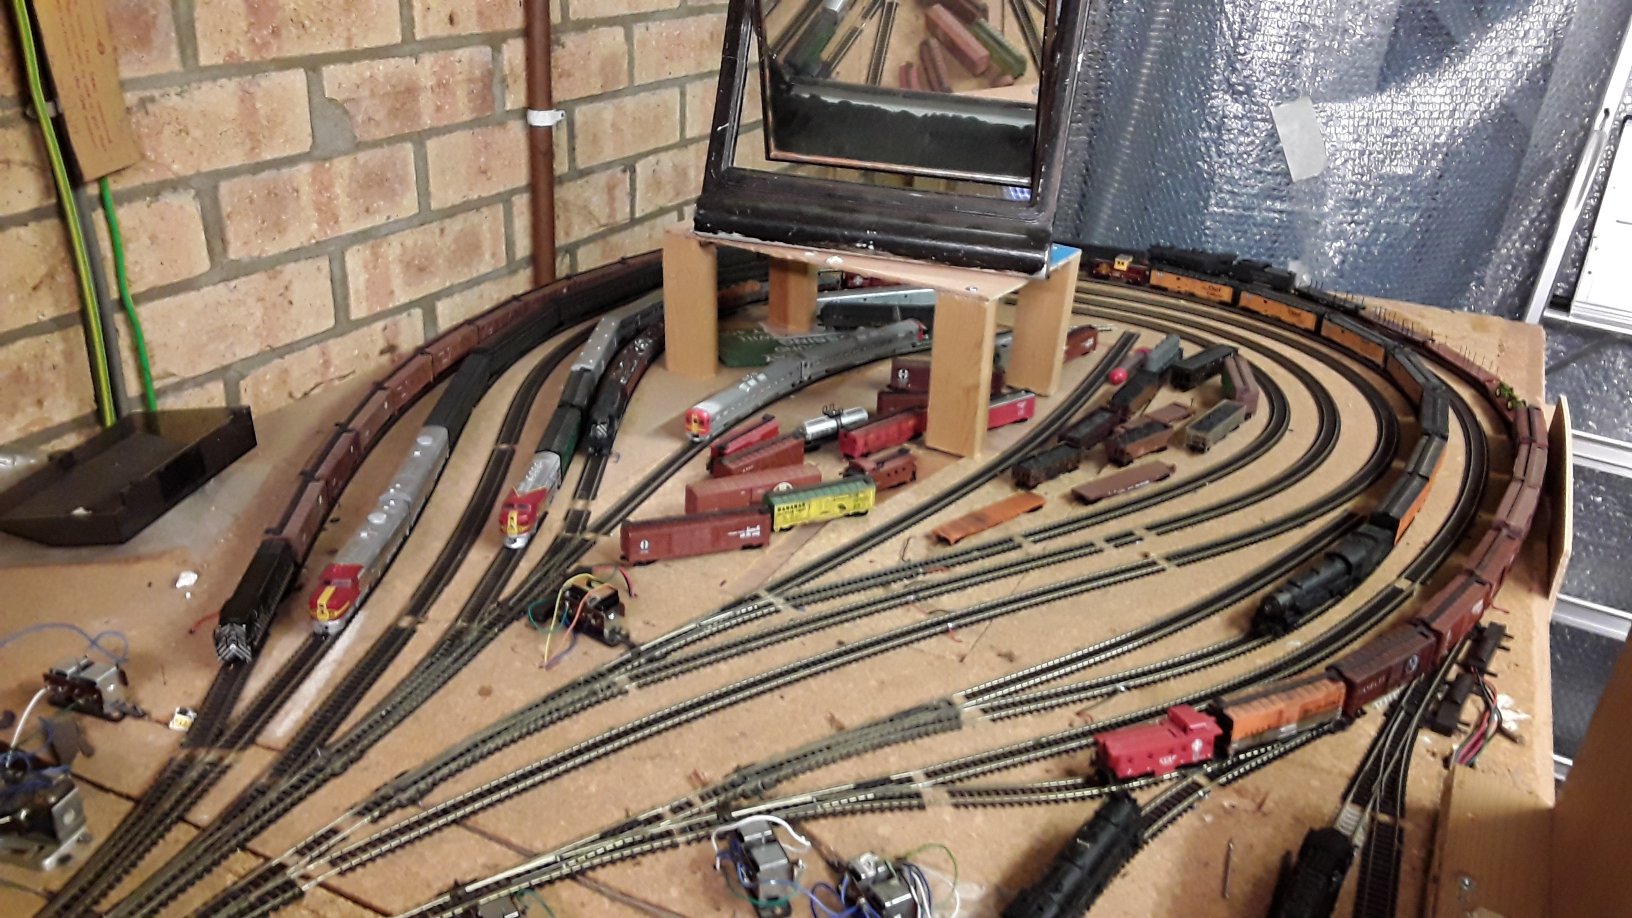
This is all great but it’s taken us a long time to clear out old boxes and junk to start work, but as you can see the framework is almost finished, the back boards are nearly all in and the last of the deck boards can be in place shortly after.
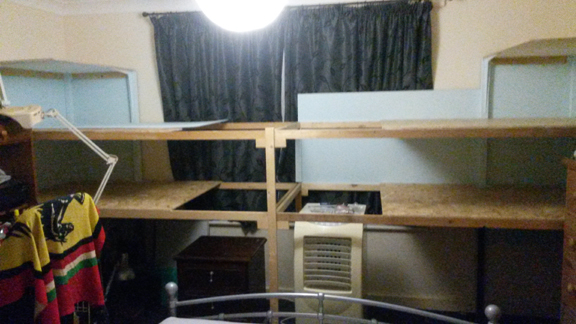
Once this is complete the cork can be laid and then track work can begin, this shouldn’t be too hard as the kato track is easy to set down and wire up. I know it doesn’t look much now, but hopefully we will have more pictures for you all to see in the in future.
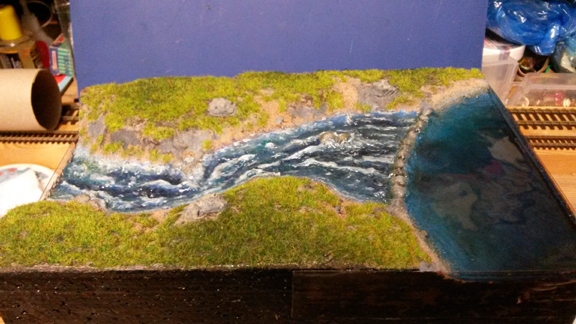
TESTING THE WATERS by Chris
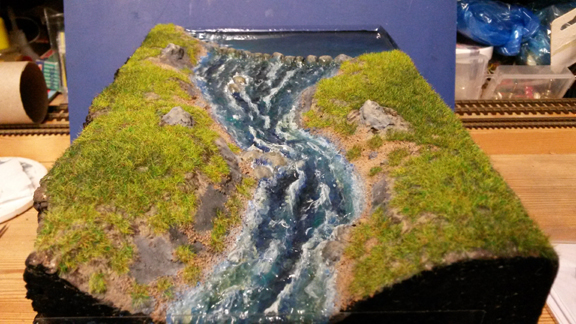
With a need to test out some new fake water products, I set about making a test model. The intention being to have a calm upper lake, feeding water over a stone weir into a river, which quickly has rapids with white water flowing over and around large stones.
Using a spare piece 50mm thick polystyrene I cut it to a block 23cm x 14cm (9” x 5.5”), next I hollowed out a flat top lake bed and then a steeply descending river. This I then laid a thin layer of Polyfilla over the top and roughly smoothed it over, leaving the raises and falls in the river to help to form the waves later. Then I used more filler to form rocks and large stones in and around the river and to form the weir.
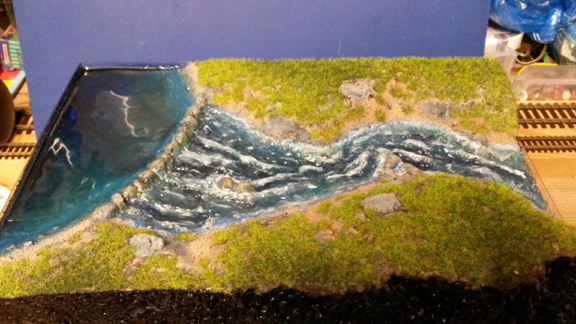
Once this had all dried, I added sandy gravel on the lake beaches and the river banks, using PVA glue. Again, after letting this dry, I started to paint my base colours: the models side are painted in black, the ground in a mid-brown for the dirt with a few light browns dry brushed on top. The rocks and stones painted in a mix of greys and tan browns. The river bed I used a wet mix of blues, greens and a little black and brown to give a churned-up rushing water colour, while on the lake I used deep blues, black, mid green and a teal to show depth and tone in the water.
Next, using a static grass machine I used a mix of dark and mid tone 2mm static grasses to form the greenery. Also, I used the clear plastic to form the lake edges and river end plates so the water products don’t slough off the edges before they dry.

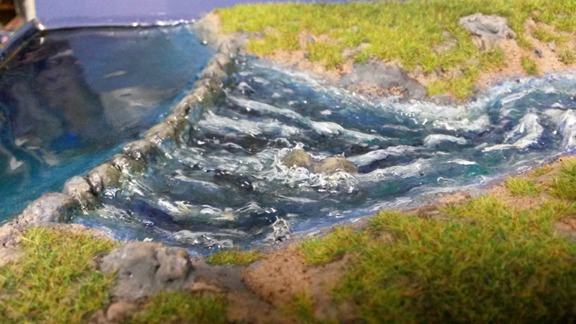
Next came the main part of the test - I want to make rapids using the Woodlands Scenics Water Effects C1212. This is a thick white paste or glue-like product that stays in the shape you put it in and then dries clear after a while (3-4mm thick seems to take about 2 days, 5-8mm thick was a lot longer). I used the bottle nozzle to form much of the wave and ridges on the water and a modelling tool to help form the wave tops and splashes.
Then for the lake I used a small amount of the Woodlands Scenics Realistic water poured on to a depth of about 2mm (pretty thin but I don’t want it deep as the product never really dries hard).
Once the river had dried clear I used matt white paint to emphasise the wave tops and white water, it looked good but I didn’t like the matt finish so using some of the Water Effects on a paint brush I just painted a thin coat over the matt white paint and let it dry to a gloss finish, and the test piece was done. I also added shoreline wave on the lake by painting on some more of the Water Effects along the beaches.
Overall, I’m happy with the final result, I learnt a lot on how to handle these products so I’m going to be using them more in the future.